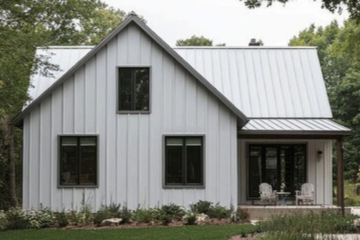
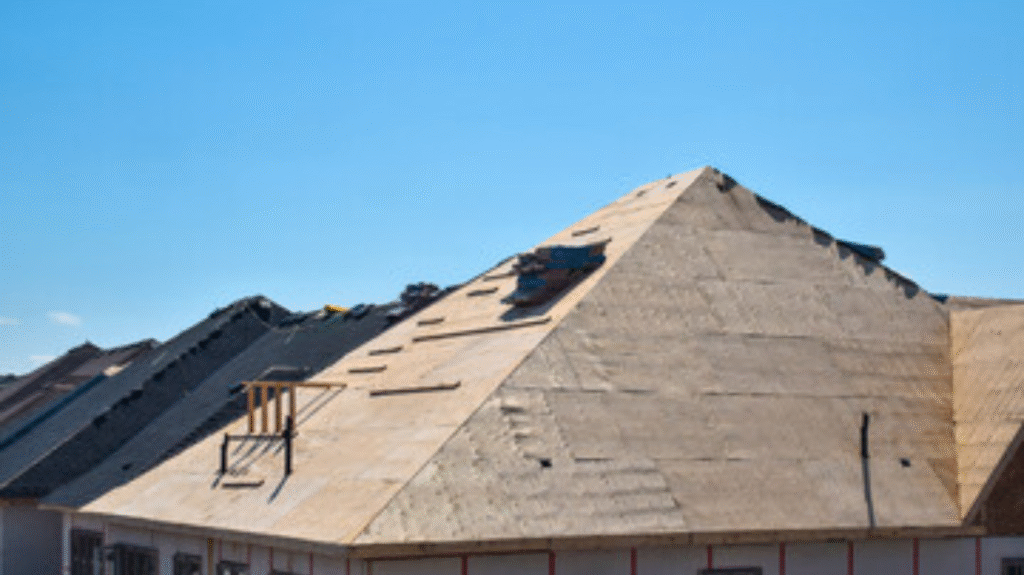
Roof sheathing plays a vital role in keeping your home safe and secure. Choosing the right roof sheathing is essential for the durability and strength of your roofing system. It’s the layer that sits between your roof’s shingles and the structural framework. Many homeowners overlook this part, but it’s one of the most critical components of your roofing system.
If you’re new to roofing, you might be wondering: What is roof underlayment? It’s the layer that goes over the sheathing and under the shingles to provide extra waterproof protection. Similarly, what is flashing on the roof? or what is roof flashing? These are materials used to direct water away from critical areas like chimneys, vents, and joints.
This blog will guide you through the best roof sheathing options available. We’ll also cover key topics such as siding flashing, ridge vents for roofs, and how all these components work together for a durable and long-lasting roof. You’ll learn how to make smart, cost-effective choices that boost the strength of your home.
By the end of this guide, you’ll understand the best sheathing types, their pros and cons, and how to choose one that fits your climate, budget, and roofing design. Let’s dive in and explore everything you need to know about roof sheathing.
Table of Contents
What Is Roof Sheathing?
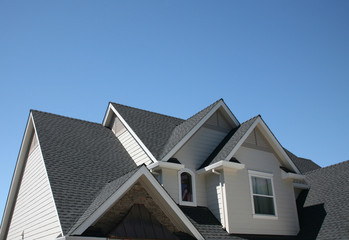
Roof sheathing is a layer of flat boards, typically made of wood or other engineered materials, that covers your home’s rafters. It acts as a base for shingles or other roofing materials and helps evenly distribute weight. Without proper sheathing, your roof could sag or fail.
Sheathing also helps with insulation and ventilation. It’s the first defense layer against environmental factors like wind, rain, and snow. It plays a major role in holding roofing nails in place and prevents uplift during strong storms. Sheathing provides a flat and stable surface to support roofing materials such as shingles, tiles, or metal panels.
Modern roof sheathing materials also contribute to energy efficiency. For example, foam board or insulated panels can reduce heat transfer and lower utility bills. Moreover, when integrated with moisture barriers, the sheathing keeps your home dry and protected from mold, mildew, and rot.
Another benefit is sound insulation. Sheathing can reduce the transmission of external noise into your living spaces. It also supports roofing accessories like vents, flashing, and solar panels by providing a secure attachment surface.
When paired with high-quality underlayment and flashing, roof sheathing enhances your roof’s ability to handle extreme weather. Combined, these elements form a reliable barrier against water penetration and thermal fluctuations.
Why Roof Sheathing Matters
- Supports the weight of the roof, ensuring structural integrity and preventing sagging over time.
- Provides a nailing base for shingles, securing them properly and reducing the risk of shingle blow-off during high winds.
- Helps prevent leaks and water damage by acting as a solid base that works in conjunction with underlayment and flashing systems.
- Contributes to the roof’s insulation and ventilation, which helps control indoor temperatures and improves energy efficiency.
- Increases roof strength in extreme weather, such as heavy snow loads or high-wind conditions, by reinforcing the roof frame.
- Reduces outside noise, creating a quieter and more comfortable indoor environment.
- Serves as a foundation for attaching critical roofing elements such as flashing, ridge vents, and solar panels.
Roof sheathing works together with ridge vents for roofs and roof underlayment to maintain airflow and keep moisture out. A well-sheathed roof leads to a stronger, longer-lasting structure.
Types of Roof Sheathing
Below are some of the best roof sheathing materials used today:
1. Oriented Strand Board (OSB)
Overview:
OSB is made by compressing layers of wood strands with adhesives. It’s one of the most common roof sheathing materials today.
Pros:
- Affordable and widely available
- Uniform and strong
- Resistant to warping and splitting
- Great for modern construction and budget-friendly builds
Cons:
- More vulnerable to water damage than plywood
- Heavier than plywood
- Longer drying time if wet
Best For:
- Residential homes in dry to moderately wet climates
- Cost-conscious construction
2. Plywood
Overview:
Plywood is made by gluing thin sheets of wood veneer together in layers, with alternating grain directions for strength.
Pros:
- Strong and durable
- Better water resistance than OSB
- Lighter than OSB
- Easier to dry out if exposed to moisture
Cons:
- Typically more expensive than OSB
- Can delaminate if exposed to excessive moisture
Best For:
- Homes in areas with heavy rainfall or snow
- Premium residential or commercial buildings

3. Tongue and Groove Boards
Overview:
These are solid wood planks that fit together with a tongue on one side and a groove on the other, creating a tight, interlocking seal.
Pros:
- Offers exceptional strength and rigidity
- Beautiful if exposed in vaulted ceiling designs
- Allows for some ventilation if spaced properly
Cons:
- Expensive
- Labor-intensive to install
- Not compatible with all modern roofing materials
Best For:
- Historic homes or exposed roof interiors
- Custom or luxury builds
4. Step Sheathing (Skip Sheathing)
Overview:
Skip sheathing consists of spaced wood boards instead of solid panels. It’s an older technique that allows for roof ventilation.
Pros:
- Allows for natural ventilation
- Lightweight
- Great for wood shake or shingle roofing
Cons:
- Doesn’t support modern roofing like asphalt shingles
- Less structural integrity
- Poor insulation and moisture resistance
Best For:
- Roofs with cedar shakes or shingles
- Historic restorations or barns
5. Foam Board Sheathing
Overview:
Made from polystyrene or polyisocyanurate foam, this sheathing type adds insulation value along with roof support.
Pros:
- Excellent thermal insulation
- Lightweight
- Helps reduce energy bills
- Moisture resistant (depending on type)
Cons:
- Expensive
- May require combination with other sheathing for structural strength
- Not ideal for heavy roofing loads
Best For:
- Energy-efficient or green homes
- Regions with extreme temperatures
Let’s compare them.
Comparison Table: Best Roof Sheathing Materials
| Material | Durability | Cost | Weight | Best For |
| OSB | High | Affordable | Light | Modern homes, budget projects |
| Plywood | Very High | Moderate | Moderate | High-wind or heavy-load areas |
| Tongue & Groove Boards | Medium | Expensive | Heavy | Aesthetic or exposed ceilings |
| Step Sheathing | Low | Low | Light | Shake roofs, historical homes |
| Foam Board | Medium | High | Very Light | Insulated roofs |
How to Choose the Right Roof Sheathing
1. Climate
Your local climate plays a crucial role in deciding which sheathing will perform best over time.
- Wet or Humid Areas:
➤ Plywood is ideal because it resists swelling and delamination better than OSB when exposed to moisture.
➤ Consider moisture barriers or waterproof coatings if using OSB in these areas. - Dry Climates:
➤ OSB works well and is more cost-effective.
➤ Flashing is still important to prevent leaks during rare storms. - Snow-Prone Regions:
➤ Plywood or tongue and groove offers better structural support for heavy snow loads.
2. Budget
The cost of roof sheathing can vary greatly based on material and thickness:
- OSB:
➤ The most affordable and commonly used.
➤ Ideal for standard builds and tight budgets. - Plywood:
➤ Slightly more expensive but offers greater durability in the long term.
➤ A better value in regions with unpredictable weather. - Tongue & Groove / Foam Board:
➤ Higher cost, usually used for specialty builds or energy-efficient homes.
➤ Tongue & groove adds aesthetic value in exposed areas.
3. Home Design & Aesthetics
Some homes require sheathing that does more than just structural work.
- Vaulted Ceilings or Exposed Roof Decks:
➤ Tongue and groove boards provide a clean, finished look.
➤ Often left visible in rustic or high-end custom homes. - Modern Builds:
➤ Foam board is often combined with structural panels for sleek, energy-efficient results.
4. Energy Efficiency / Insulation Needs
If your goal is to reduce energy consumption or meet modern energy codes:
- Foam Board Sheathing:
➤ Adds R-value (thermal resistance) directly to the roof.
➤ Ideal for net-zero or high-performance homes. - Combination Systems:
➤ You can combine plywood or OSB with foam board for both strength and insulation.
5. Flashing Considerations
Flashing is a waterproof barrier installed at critical areas like chimneys, skylights, valleys, and vents.
- Why It Matters:
Even the best sheathing won’t last if flashing fails. Leaks can rot the sheathing beneath, especially OSB. - Tips:
➤ Use metal flashing in valleys and around skylights.
➤ Step flashing is best for chimneys and walls.
➤ Apply ice and water shield membranes in vulnerable areas before adding sheathing.
The Role of Underlayment and Flashing
Underlayment: The Unsung Hero Beneath Your Roof
Understanding what is roof underlayment is key to building a weather-resistant roof. After roof sheathing is installed, underlayment goes on top before shingles. This protective barrier acts as a secondary shield against moisture, rain, and snow. Even if your shingles crack or blow off during a storm, the underlayment prevents water from seeping into your home.
There are three main types of underlayment:
- Asphalt-saturated felt (tar paper): Traditional and affordable.
- Rubberized asphalt: Offers superior waterproofing and flexibility.
- Synthetic underlayment: Lightweight, tear-resistant, and common in modern roofing.
Each type serves a different purpose, depending on your climate and roofing material. In colder regions, rubberized asphalt is preferred due to ice dam protection.
Roof Flashing: Targeted Protection Where It Matters Most
Knowing what is flashing on the roof helps you understand how water is redirected away from vulnerable spots. Flashing is typically made of galvanized steel, aluminum, or copper. It’s installed in joints and intersections like around chimneys, vents, skylights, and valleys where water is most likely to collect.
Improper or missing flashing is a top cause of roof leaks. It doesn’t just protect your sheathing; it preserves your home’s interior from long-term water damage. A well-installed flashing system works hand-in-hand with your sheathing and underlayment for maximum protection.
Siding Flashing: Where Roof Meets Wall
Don’t overlook siding flashing it’s used where your roofline meets vertical surfaces like dormers, walls, and chimneys. This metal or flexible strip ensures that water doesn’t sneak behind siding materials and cause rot or mold.
Siding flashing is especially important for low-slope roofs or areas prone to heavy rainfall. If it fails, water can enter wall cavities and damage insulation, framing, and drywall. That’s why flashing, though small in size, has a huge impact on roof durability.
Ventilation and Roof Health
A good roof system also needs proper ventilation. That’s where ridge vents for roofs come in. These vents are installed along the peak of your roof and help hot air escape from your attic. Without proper ventilation, moisture can build up, weakening the sheathing and causing mold.
Pair ridge vents with soffit vents and you’ll have a balanced system that prolongs the life of your roof sheathing.
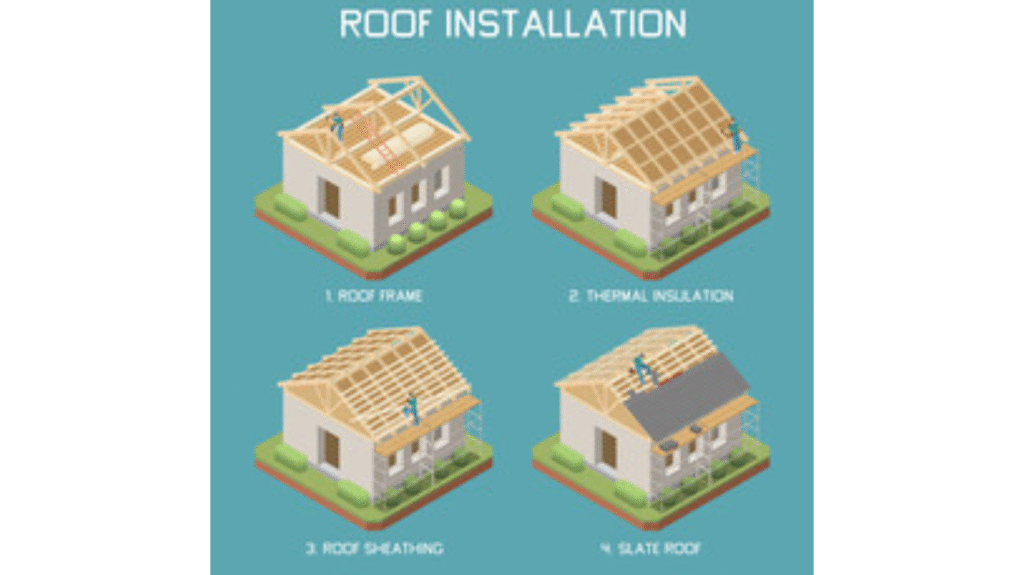
Installation Tips for Roof Sheathing
1. Use the Correct Nail Size and Spacing
Always follow building code recommendations and manufacturer guidelines for nail type, size, and spacing. Generally:
- Use 8d common nails for plywood or OSB panels.
- Nails should be spaced 6 inches apart along panel edges and 12 inches apart in the center (field).
This ensures the panels stay secure even under high winds or heavy snow loads.
2. Leave Expansion Gaps Between Panels
Wood-based sheathing materials like OSB and plywood expand and contract with temperature and moisture. To prevent buckling:
- Leave a 1/8-inch gap between all panel edges.
- Many panels come with self-spacing edges, but if not, use a carpenter’s pencil as a spacer.
This allows natural movement and avoids stress cracks over time.
3. Ensure Panels Are Flush and Level
All sheathing panels should sit flush with rafters or trusses and align cleanly with roof edges. Uneven or overhanging panels can:
- Complicate shingle installation
- Cause water pooling or improper runoff
- Weaken roof structure integrity
Use a chalk line and level to double-check each row as you install.
4. Install Moisture Barriers or Roof Underlayment
Before shingles go on, cover the sheathing with a moisture barrier:
- Use synthetic underlayment or asphalt felt to protect from rain and snow infiltration.
- In ice-prone regions, apply ice and water shield membranes near eaves and valleys.
This step acts as your roof’s secondary defense, guarding the sheathing against rot and mold.
5. Inspect for Mold, Rot, or Soft Spots First
Never install new sheathing over compromised materials. Check:
- Rafters and joists for sagging or rot
- Existing sheathing for mold, mildew, or moisture damage
- Attic areas for ventilation issues
Repair or replace damaged sections before proceeding. Ignoring these signs can lead to premature roof failure, even with new materials.
Common Mistakes to Avoid
- Skipping underlayment
- Poor nailing practices
- Using the wrong type of sheathing for your roof slope
- Not sealing flashing properly
Any of these mistakes can reduce the effectiveness of your roof sheathing and lead to costly repairs.
Maintenance Tips
- Check for soft or sagging spots annually
- Replace damaged sheathing during re-roofing
- Keep gutters clear to avoid water backup
- Inspect flashing for rust or damage
A well-maintained roof means your sheathing stays strong and effective.
Final Thoughts
Roof sheathing is more than just a layer of wood it’s a crucial part of your home’s structure. With the right materials and proper installation, you can ensure your roof stands strong against the elements.
Make sure to also understand related components like what is roof underlayment, what is roof flashing, and the role of ridge vents for roofs. Together, they create a powerful barrier against water, wind, and heat.
Whether you’re building a new home or replacing an old roof, choosing the best roof sheathing will help protect your investment and add lasting value.
For expert installation and advice, contact the professionals at United Developers MD VA. We’re here to make your roofing project safe, efficient, and durable.
Contact United Developers today for a free estimate and expert roofing advice tailored to your needs.
READY TO TRANSFORM YOUR SPACE?
Discover top-rated construction, remodeling, and renovation services tailored to your needs.
Trusted by 50+ businesses across Maryland & Virginia.