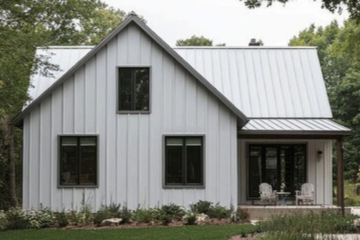
Your roof’s first line of defense isn’t just the shingles it’s the ridge cap. This essential component seals the very top of your roof, where two slopes meet, and plays a critical role in preventing leaks, wind damage, and moisture buildup. Without a durable and properly installed roof ridge cap, your entire roofing system is exposed to harsh weather, water intrusion, and even mold or rot over time. Homeowners often overlook the ridge cap, but this small feature has a big job. Whether you’re using a shingle ridge cap or a steel roof ridge cap, choosing the right materials and ensuring correct installation can drastically improve your roof’s performance.
Beyond protection, the ridge cap also enhances your home’s appearance by giving the roof a clean, finished look. In some systems, it supports ventilation as well, allowing hot, moist air to escape from your attic. A poorly installed or missing roofing ridge cap leads to significant structural issues and costly repairs. In this blog, we’ll explore everything you need to know from types of ridge caps and signs of failure to installation tips, benefits, and even how to walk safely on your roof. Let’s dive into the complete guide to the roof ridge cap system.
Table of Contents
What Is a Ridge Cap?
A ridge cap is the finishing material installed along the ridge (or peak) of your roof. It covers the seam where two roof slopes meet, acting as a shield against weather elements.
There are different types of ridge caps:
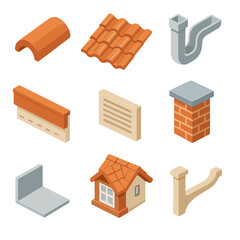
- Shingle Ridge Cap: Made from asphalt shingles, cut and layered over the roof peak.
- Metal Ridge Cap / Steel Roof Ridge Cap: Custom-bent metal pieces that fit precisely over a metal roof’s ridge.
- Cap Metal Roof: Often used in commercial or steel roofing systems for additional durability.
Why Is a Ridge Cap Important?
The ridge cap does more than just seal the peak:
Protects Against Water Penetration
A ridge cap acts as a protective barrier at the highest point of the roof the roof ridge which is especially vulnerable to rain, snow, and wind-driven moisture. Without a proper ridge cap roof in place, water can seep into the underlying roof deck, leading to:
- Rotting of the wooden frame
- Mold and mildew buildup in the attic
- Ceiling leaks inside the home
This is particularly important for shingle ridge cap installations, where overlapping shingles are designed to shed water efficiently. In metal ridge cap systems, weather-tight fasteners and sealants help channel moisture off the roof and into the gutters. Over time, a missing or poorly installed roof ridge cap can cause thousands of dollars in water damage. That’s why regular inspection and high-quality roof capping is non-negotiable.
Enhances Roof Ventilation
The ridge cap is often installed over a vent forming what’s known as a vented ridge cap. This design allows warm, moist air from the attic to escape through the roof ridge, which:
- Prevents heat buildup in summer
- Reduces moisture accumulation in winter
- Lowers cooling and heating costs
Proper ventilation also extends the life of your roofing materials. Shingles exposed to excessive attic heat can warp or crack prematurely. With a functioning ridge cap roof, you maintain optimal airflow and reduce the risk of ice dams in colder climates.
If you’re investing in a steel roof ridge cap or cap metal roof, ensure it includes built-in ventilation slots or is paired with a ridge vent system.
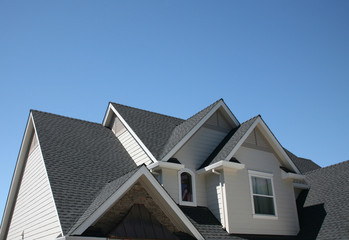
Improves Aesthetic Appearance
While functionality is key, ridge caps also serve a visual purpose. They create a clean, finished look by capping the ridge line the peak where two sloping roof planes meet. Without a roof ridge cap, even the best roof looks unfinished or poorly constructed.
- Shingle ridge caps match the color and texture of surrounding shingles for a seamless appearance.
- Metal ridge caps can be color-coated to blend with standing seam panels or corrugated roofs.
- Some ridge cap shingle designs have a slightly raised profile that adds depth and dimension to your roofline.
Whether you have asphalt shingles, tile, or metal, the ridge cap gives your home a professionally finished curb appeal.
Supports Structural Integrity
The ridge of roof is not just a visual line it’s a structural joint where the two slopes meet and must be securely covered. A high-quality ridge cap ensures:
- Protection of underlying materials like the underlayment and sheathing
- Wind uplift resistance (especially important in high-wind zones)
- Secure sealing against environmental elements
When paired with proper flashing and roofing cement, the roofing ridge cap prevents separation at the roof seam. Especially in metal roof ridge cap systems, tightly screwed or crimped joints reinforce the structural bond. This reduces the risk of long-term sagging, leaks, or storm-related damage.
Proper roof ridge cap installation is crucial to prevent long-term damage.
Materials: Shingle vs. Metal Ridge Caps
| Feature | Shingle Ridge Cap | Metal Ridge Cap / Steel Roof Cap |
| Lifespan | 15–25 years | 30–50 years |
| Durability | Moderate | High |
| Cost | Lower | Higher |
| Appearance | Matches asphalt roofs | Ideal for metal roofs |
| Maintenance | May curl/crack over time | Rust-resistant but needs inspection |
Choose the material based on your roof capping needs, budget, and roof type.
Ridge Cap Mistakes to Avoid
Let’s go over the top errors that can jeopardize your roof ridge integrity:
1. Missing or Cracked Cap Shingles
A damaged or missing shingle ridge cap is one of the most common early signs of roof trouble. These shingles are specially designed to cover the ridge of the roof, which is the highest point where two roof slopes meet. When these ridge caps crack or go missing, it creates a direct entry point for rain, snow, and even pests.
Small cracks may not seem like a big deal at first, but they can quickly widen with seasonal changes. Water infiltration through these gaps can saturate the underlayment, rot the decking, and even stain your interior ceilings. Over time, mold and mildew may develop in your attic.
What to do:
Inspect your ridge cap roof every season, especially after storms. If you notice lifted or missing shingles, replace them with new shingle ridge cap pieces made to fit your roof’s pitch. Also, use high-quality adhesive and nails to prevent future dislodging.
2. Flashing Separations
Flashing refers to thin metal strips installed to direct water away from joints and seams in your roofing system. The roof ridge cap should always be integrated with flashing to create a water-tight seal, especially at connection points between roof sections.
When flashing is not installed properly, or if it becomes loose over time, water can sneak under the ridge cap and make its way into the attic or wall cavities. This is particularly risky during wind-driven rain or heavy snowfall. Poorly aligned flashing also creates uplift potential during high winds.
What to do:
Examine the flashing under and around your ridge caps. Make sure it overlaps the roofing material and is sealed with waterproof caulking or roofing cement. Replace any rusted or warped pieces of flashing to avoid long-term water damage.
3. Attic Water Stains
Discoloration on attic ceilings or walls often points to one problem: water penetration. A common culprit is a poorly installed or aged ridge cap roof.
Even tiny gaps in your roof ridge cap system caused by poor alignment, missing nails, or worn-out sealant can allow moisture to seep in over time. The results may go unnoticed until significant damage occurs, including insulation damage, wood rot, and mold growth.
Stains often appear as brown, yellow, or gray patches and may grow with each rainfall. If you’re seeing consistent moisture near the ridgeline roof, it’s time for a full inspection.
What to do:
Look for signs of moisture right beneath the ridge of roof. Have a roofing professional assess whether the shingle ridge cap or metal ridge cap is failing. Immediate repair can prevent thousands in structural damage.
4. Rust or Paint Peeling on Metal Ridge Caps
Your metal ridge cap is built to last, but over time, it’s still vulnerable to rust, especially in coastal areas or regions with high humidity. When you see rust, bubbling paint, or faded coating, your steel roof ridge cap is telling you it needs attention.
Rust can eat through the metal, creating weak points that allow water to penetrate. Paint peeling may indicate that the protective finish has failed, exposing the metal to oxygen and moisture. If ignored, this can compromise the strength of your cap metal roof system entirely.
What to do:
Light surface rust can be sanded down and treated with anti-rust primers before repainting. However, if the rust is deep or the metal is corroding, replace the steel roof ridge cap entirely. Always opt for galvanized or coated steel products for better resistance.
5. Visible Seams or Gaps
The ridge cap should create a smooth, continuous finish along the peak of your roof. If you see visible seams, open joints, or uneven overlaps, it’s a sign of poor installation or wear. These gaps can invite not just water, but also small pests and insects that can nest beneath your roof.
Seams that aren’t sealed allow wind to lift shingles or metal edges. This is especially dangerous in storms, where the wind can rip off entire sections of the ridge cap roof. Loose parts also vibrate in the wind, potentially leading to more damage over time.
What to do:
During installation, seams must be overlapped properly and secured with roofing screws or nails, and then sealed using roofing cement or weatherproof caulk. If gaps are visible now, have a professional re-seal or re-install the roofing ridge cap immediately.
Pro Tip: Wear the Best Shoes to Wear on a Roof
Inspecting your ridge cap or walking on a roof requires the right gear. Choose shoes with soft rubber soles and strong grip to avoid slipping. This is crucial for safety when walking along the roof ridge cap, especially on metal or steep surfaces.
How to Install a Ridge Cap Roof (Step-by-Step)
Whether you’re installing a cap metal roof or a shingle ridge cap, proper installation ensures protection, durability, and optimal ventilation. Here’s a deeper look at each step so you can do it right the first time.
1. Prep the Ridge Area
Before anything else, clear the entire roof ridge of any dirt, old materials, or loose nails. A clean surface ensures better adhesion of sealants and a tighter fit of the new ridge caps.
- Check for soft spots in the wood decking.
- Remove old ridge cap shingles if you’re replacing them.
- Make sure the underlying roofing felt or underlayment is intact.
- For a metal ridge cap, ensure the panels are flush at the top and there’s no warping.
Why it matters: A clean, stable base prevents premature failure of your roof ridge cap.
2. Install Ridge Vent (If Applicable)
If your roofing system includes a ridge vent, install it along the ridge of roof before adding any caps. Ridge vents are essential for attic ventilation.
- Choose a vented ridge cap system compatible with your roofing material.
- Leave a 1″ to 2″ gap along both sides of the ridge decking to allow air to flow.
- Nail or screw the ridge vent in place securely.
Why it matters: A vented ridge cap roof helps regulate attic temperature, which extends the life of your roof and improves energy efficiency.
3. Place Starter Strip or Metal Flashing
Adding a moisture barrier under the cap is crucial for leak prevention.
- Use metal flashing or a starter strip aligned along the ridge.
- For a metal ridge cap, closure strips may be used to block water, insects, and dust from entering.
- Flashing should extend at least a few inches past the ridge line and be secured with nails or screws.
Why it matters: Flashing or closure strips add a layer of protection between the roofing ridge cap and the rest of your roofing system.
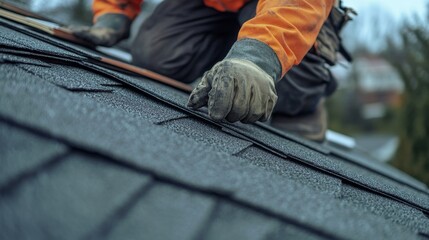
4. Apply Ridge Cap Shingles or Metal Caps
This step varies depending on whether you’re installing a shingle ridge cap or a steel roof ridge cap:
For Asphalt Shingles:
- Use pre-cut ridge cap shingles or cut standard shingles into 3-tab pieces.
- Start from the end opposite the prevailing wind direction.
- Overlap each shingle by about 5–6 inches.
- Nail each piece with galvanized roofing nails (1-inch from the edges).
For Metal Roofs:
- Line up your metal ridge cap over the peak.
- Use foam closure strips beneath the cap for a tight seal.
- Fasten the cap using self-tapping screws through pre-drilled holes.
- Ensure proper overlap of metal pieces to allow water runoff.
Why it matters: Proper overlapping and secure attachment help the ridge cap roof resist high winds and prevent water leaks.
5. Seal and Inspect
Once all ridge caps are in place, sealing and inspecting the installation is critical.
- Use high-quality roofing sealant along seams, edges, and nail heads.
- Check for even alignment along the roof ridge there should be no gaps.
- Look underneath to ensure the ridge vent is unobstructed and closure strips are correctly positioned.
- Perform a light water test (simulated rain) to see if water runs off correctly.
Why it matters: This final step ensures that the roof ridge cap is watertight and ready for years of weather exposure.
Final Tips for Installing Ridge Caps
- Always walk carefully if unsure, learn how to safely walk on roof using safety harnesses and roof brackets.
- Wear best shoes to wear on a roof, such as soft-soled boots that offer grip.
- Choose compatible materials: asphalt for shingles, and steel roof cap for metal systems.
- Follow manufacturer instructions when using a steel roof ridge cap, especially with interlocking panels.
- In cold climates, make sure ridge vent materials are snow-resistant.
How to Walk Safely on a Roof
If you need to inspect your roof capping:
- Wear the best shoes to wear on a roof rubber-soled for grip.
- Walk along rafters to distribute weight.
- Avoid the ridge line itself if unstable.
- Use safety harnesses and roof brackets.
Safety matters when checking your ridge cap installation!
When to Replace Your Ridge Cap
You may need a replacement if:
1. The Roof Ridge Cap is Cracked or Missing
- When your ridge cap (the protective covering installed at the highest point of your roof) is cracked or entirely missing, it’s a serious issue. The ridge cap roof plays a vital role in shielding the roof’s peak from water, snow, and wind. If the shingle ridge cap breaks down, rain can seep into the underlayment and decking below, causing rot and long-term damage. Missing pieces also allow pests and debris to infiltrate the roof ridge, accelerating wear and tear.
- Tip: Regularly inspect your roof ridge cap after heavy storms or high winds. If you notice gaps or missing shingles, it’s time for immediate replacement.
2. You See Attic Leaks or Mold
- One of the most common signs of a failing roofing ridge cap is the appearance of water stains, mold, or mildew in your attic. These stains often form where water has been slowly dripping through an unsealed seam or damaged cap over time. Mold is especially dangerous, not just for your roof structure but also for your family’s health.
- A ridge cap roof is designed to create a watertight seal. If compromised, it loses its primary function protecting against water penetration.
- Tip: Check your attic during or right after rain. If you notice a musty smell, damp insulation, or black spots on wood, the shingle ridge cap or flashing may be compromised.
3. The Steel Roof Cap is Rusted or Lifting
- For homes with a steel roof ridge cap or metal ridge cap, rust and corrosion are telltale signs of trouble. Over time, weather and oxidation can deteriorate the protective finish of the cap metal roof, leading to leaks, sharp edges, and failure to stay secured to the ridge of roof.
- Lifting is another critical issue. A metal ridge cap should sit flush with the roof. If it starts to rise, this creates an entry point for wind, rain, and even rodents.
- Tip: Repaint and reseal metal caps every few years using weather-resistant sealants. Replace any severely rusted or bent steel roof caps to maintain integrity.
4. Your Roof is Over 20 Years Old
- Even if your roof ridge cap looks fine on the surface, age matters. Most shingle ridge caps and metal ridge caps have a lifespan of 20 to 25 years. After that, materials begin to degrade, adhesives wear out, and the likelihood of small gaps or cracks forming increases dramatically.
- An aging ridge cap is more prone to fail during extreme weather events. It’s a critical part of your roof capping system and shouldn’t be overlooked when evaluating roof longevity.
- Tip: If your roof is nearing the 20-year mark, include the roof ridge cap in your inspection checklist during routine maintenance or before selling your home.
Professional Help vs. DIY
Installing a roofing ridge cap yourself is possible but risky. For guaranteed results:
- Hire experienced contractors like United Developers
- We install steel roof ridge caps, shingles, and metal systems
- We also inspect for ventilation, flashing, and sealant issues
Final Thoughts
A well-installed ridge cap is vital for protecting your home. Whether it’s a shingle ridge cap or a steel roof cap, quality materials and proper installation can make the difference between a strong roof and expensive repairs. Don’t ignore the ridge of roof when planning roofing upgrades.
For expert service, reach out to United Developers MD VA your local professionals in roof capping and home protection.
Want to protect your home with a premium roof ridge cap?
Contact United Developers MD VA today for an free inspection or quote.
READY TO TRANSFORM YOUR SPACE?
Discover top-rated construction, remodeling, and renovation services tailored to your needs.
Trusted by 50+ businesses across Maryland & Virginia.