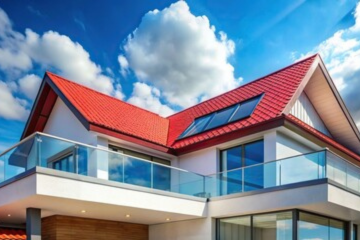
If you are thinking about upgrading your home’s roof, metal roofing is one of the best options. Metal roofs are durable, energy-efficient, and built to last for decades. Many homeowners also choose metal roofing because it requires less maintenance and performs well in harsh weather. If you want expert insights or professional help, working with experienced metal roofing installation contractors can make the entire process easier and more reliable.
But installing a metal roof may seem challenging if you are doing it for the first time. Don’t worry! In this guide, we will explain how to install metal roofing step by step, using simple words anyone can understand.
Whether you are replacing an old roof or installing a new one, this guide will help you plan, prepare, and complete your metal roofing project successfully.
Why Choose Metal Roofing for Your Home
Before learning how to install metal roofing, let’s look at why metal roofs are a great choice for homes:
- Durability: Metal roofs can last 40–70 years depending on the material.
- Weather Resistant: They resist heavy rain, snow, wind, and fire.
- Energy Efficiency: Metal reflects sunlight, keeping your home cooler in summer.
- Low Maintenance: Unlike other roofing materials, metal requires very little maintenance.
- Eco-Friendly: Most metal roofing is recyclable.
Now that you know the benefits, let’s move to the installation process.
Tools and Materials Needed
Before starting, make sure you have the right tools and materials. This will make your work easier and safer.
Materials:
- Metal roofing panels
- Roofing screws with rubber washers
- Roof underlayment (synthetic or felt)
- Ridge caps and trim pieces
- Flashing (for edges, valleys, and chimneys)
Tools:
- Tape measure
- Chalk line
- Circular saw or metal cutting tool
- Drill or screw gun
- Ladder and safety harness
- Hammer and roofing nails
Step 1: Prepare Your Roof
The first step in how to install metal roofing is to prepare your roof properly.
- Inspect the Roof Deck: Check for damaged or rotten wood. Replace any weak areas.
- Clean the Roof: Remove debris, old nails, and dirt. A clean surface ensures better adhesion.
- Install Underlayment: Lay a roofing underlayment over the roof deck. This acts as a moisture barrier. Make sure it is smooth with no wrinkles. Overlap each row by a few inches.
- Install Drip Edge: Place metal drip edges along the eaves to prevent water damage. Nail them into place securely.
Proper preparation is key to a long-lasting metal roof.
Step 2: Measure and Cut Metal Panels
Next, you need to measure your roof and cut the metal panels to fit.
- Measure Carefully: Measure the length and width of your roof sections.
- Mark Panels: Use a chalk line to mark where to cut the metal.
- Cut Panels Safely: Use a circular saw with a metal cutting blade or tin snips. Always wear safety gloves and glasses.
Make sure the panels are slightly longer than the roof’s edge to allow for overlapping and trimming.
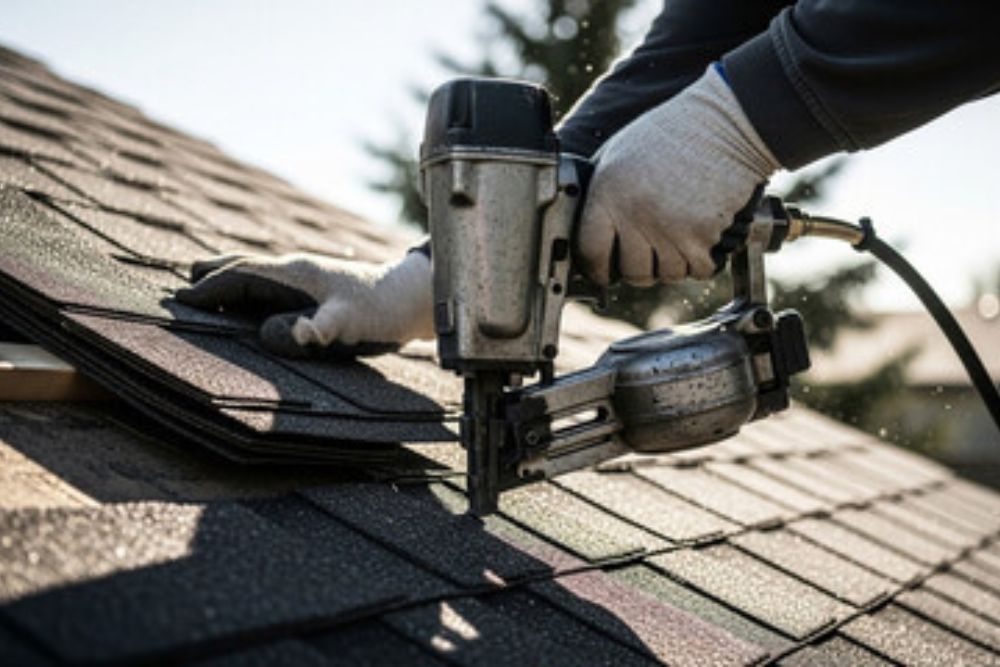
Step 3: Install the First Panel
Start from the bottom edge of the roof.
- Place the Panel: Align it with the edge of the roof and overhang the drip edge slightly.
- Secure Screws: Use roofing screws with rubber washers to prevent leaks. Space screws according to the manufacturer’s instructions (usually 12–24 inches apart).
- Check Alignment: Ensure the panel is straight. Misaligned panels can cause leaks and look uneven.
This first panel sets the base for the rest of the roof, so take your time to align it perfectly.
Step 4: Install Remaining Panels
Once the first panel is in place, continue installing the rest.
- Overlap Panels: Overlap each panel according to the manufacturer’s guidelines. Usually, one ridge or groove overlaps the next panel.
- Secure Each Panel: Use screws with rubber washers for each panel. Don’t overtighten screws, or you may damage the metal.
- Maintain Straight Lines: Use a chalk line to keep panels straight.
Work slowly and carefully. Proper alignment ensures the roof looks great and performs well.
Step 5: Install Flashing and Trim
Flashing protects vulnerable areas of the roof where leaks can happen.
- Install Valley Flashing: Place flashing in valleys where two roof sections meet.
- Around Chimneys and Vents: Use step flashing or pipe flashing around chimneys and vents.
- Install Ridge Caps: Place ridge caps along the roof’s peak. Secure with screws, ensuring they cover the panel seams completely.
- Edge Trim: Finish edges with metal trim for a neat look.
Flashing and trim are important for preventing leaks and giving a professional finish.
Step 6: Check and Seal
After all panels and trims are installed:
- Inspect Screws: Ensure all screws are tight but not over-torqued.
- Check Overlaps: Make sure panels are properly overlapped.
- Seal Gaps: Apply roofing sealant where necessary, especially around vents, chimneys, and edges.
A final inspection ensures your roof is strong, secure, and waterproof.
Step 7: Safety Tips While Installing Metal Roofing
Working on a roof is risky. Keep these safety tips in mind:
- Always use a safety harness.
- Wear non-slip shoes and gloves.
- Avoid working in wet or windy weather.
- Use a sturdy ladder and never lean over the edge.
- Keep tools and screws organized to prevent accidents.
Safety first ensures your roofing project goes smoothly without injuries.
Step 8: Maintenance Tips for Metal Roofs
Once your metal roof is installed, follow these simple maintenance tips to extend its life:
- Clean Gutters Regularly: Prevent debris buildup that can cause water damage.
- Inspect Annually: Check for loose screws, damaged panels, or rust spots.
- Trim Overhanging Branches: Prevent scratches and dents from falling branches.
- Avoid Walking on Roof: If necessary, walk only on panel seams to prevent damage.
Proper maintenance keeps your roof looking new for decades.
FAQS
How long does it take to install a metal roof on a house?
The installation time depends on the size of your roof and the complexity of its design. On average, a typical home can take 1–3 days for a professional crew. DIY installation may take longer.
Can I install a metal roof over my existing shingles?
Yes, in many cases, metal roofing can be installed over existing shingles. However, the roof must be inspected for damage, and the underlayment must be installed correctly to prevent leaks.
What is the average lifespan of a metal roof?
Metal roofs can last 40–70 years, depending on the material and maintenance. They are one of the most durable roofing options available.
Can I walk on a metal roof safely?
Walking on a metal roof should be done carefully, ideally on the panel seams, to avoid damage. Using proper footwear and safety harnesses is essential.
Conclusion
Learning how to install metal roofing for your home is not as difficult as it may seem. By preparing your roof, measuring and cutting panels carefully, securing them properly, and installing flashing and trim, you can achieve a strong, durable, and attractive roof.
Metal roofing is a long-term investment that adds value, protects your home, and improves energy efficiency. Whether you hire professionals or do it yourself, following these step-by-step instructions will ensure a safe and successful project.
If you are looking for high-quality metal roofing materials or professional installation, United Developers can help you. We provide durable roofing solutions that stand the test of time.
READY TO TRANSFORM YOUR SPACE?
Discover top-rated construction, remodeling, and renovation services tailored to your needs.
Trusted by 50+ businesses across Maryland & Virginia.